
How to Install a Thermal Fuse in Appliances: Step-by-Step Guide
Learn how to select, test and install a thermal fuse in household appliances with safety tips, wiring diagrams and South African purchasing notes from Communica.
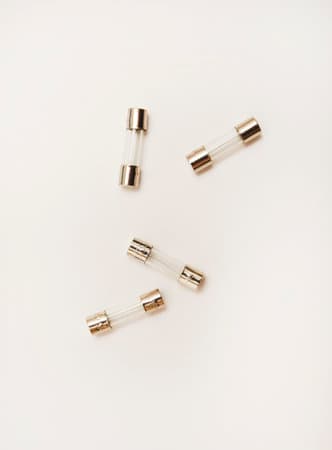
Safety-first Checks
Always isolate mains, test continuity, and inspect for causes of overheating before replacing.
Match Key Specs
Replace with a thermal fuse that matches temperature, current, voltage and mounting style.
Local Availability
Common fuses available for collection from Communica branches; check stock and lead times.
Overview: What a Thermal Fuse Does and When to Replace It
A thermal fuse is a single-use temperature safety device that opens a circuit when a specified temperature is exceeded. They are commonly found in dryers, heaters, coffee machines, and other appliances where overheating could create a fire risk. This guide explains how to select, test, and install a thermal fuse safely, with South African practical notes on availability, lead times, and local brands stocked by Communica.
Safety first: required tools and PPE
- Insulated screwdriver set and needle-nose pliers
- Multimeter with continuity and voltage checks
- Heat-resistant insulating sleeves or ceramic bead (if required by part)
- Safety glasses and gloves; disconnect mains and unplug appliance before starting
Basic selection criteria
Select a thermal fuse by matching the temperature rating, mounting style, and current/voltage capability. For many domestic appliances, ratings fall between 72°C and 240°C. Confirm the replacement matches the original fuse's temperature cutoff (not a higher temperature) and that its voltage/current ratings meet or exceed the appliance's requirements.
Quick spec comparison
| Spec | Typical Range | Application Notes |
|---|---|---|
| Temperature rating | 72°C - 240°C | Match to original component; lower = trips earlier |
| Current/voltage | 0.1 A - 15 A; 125 VAC / 250 VAC common | Ensure rating >= appliance operating current and voltage |
| Mounting style | Inline leads, tab terminals, PCB mount | Choose same physical form for safe fit and thermal coupling |
If you need to browse replacement parts locally, Communica stocks a wide selection across categories; search the components collections here or view all products here for cross-reference.
Testing the old thermal fuse
Before replacing, confirm the thermal fuse has failed. With the appliance unplugged, remove access covers to expose the fuse. Use a multimeter set to continuity or resistance (ohms). A good thermal fuse shows near-zero ohms (continuity); a failed/open fuse shows infinite resistance.
Simple continuity check (multimeter):
- Set meter to continuity mode.
- Place probes on each terminal of the fuse.
- Beep or 0-few ohms = good; OL/infinite = open (replace).
If the fuse is open, also inspect the appliance for the underlying cause (blocked airflow, failed thermostat, or stuck heater) before installing a replacement.
Internal link: branches and local pickup
If you prefer to collect parts in person, check Communica branch trading hours and availability for faster collection from Samrand, Pretoria CBD, or Cape Town via our branches page.
Related Circuit Protection & Passive Components Products
Discover quality circuit protection & passive components products related to How to Install a Thermal Fuse in Appliances: Step-by-Step Guide


Ck-100 | Thermostat • 100°c • 250v • 10a • Fixed Bracket Horizontal Lead • 19.5x6x4.2mm
Ck-100 | Thermostat • 100°c • 250v • 10a • Fixed Bracket Horizontal Lead • 19.5x6x4.2mm

Rh03b-75 | Thermal Cut-off • 75°c • 250v • 2a • Axial • 10x2.8mm
Rh03b-75 | Thermal Cut-off • 75°c • 250v • 2a • Axial • 10x2.8mm

Rh03b-150 | Thermal Cut-off • 150°c • 250v • 2a • Axial • 10x2.8mm
Rh03b-150 | Thermal Cut-off • 150°c • 250v • 2a • Axial • 10x2.8mm

Rh01-125 | Thermal Cut-off • 125°c • 250v • 2a • Radial • 6x6.5x2.8mm
Rh01-125 | Thermal Cut-off • 125°c • 250v • 2a • Radial • 6x6.5x2.8mm

Rh01-120 | Thermal Cut-off • 120°c • 250v • 2a • Radial • 6x6.5x2.8mm
Rh01-120 | Thermal Cut-off • 120°c • 250v • 2a • Radial • 6x6.5x2.8mm

Rh01-110 | Thermal Cut-off • 110°c • 250v • 2a • Radial • 6x6.5x2.8mm
Rh01-110 | Thermal Cut-off • 110°c • 250v • 2a • Radial • 6x6.5x2.8mm

Rh01-100 | Thermal Cut-off • 100°c • 250v • 2a • Radial • 6x6.5x2.8mm
Rh01-100 | Thermal Cut-off • 100°c • 250v • 2a • Radial • 6x6.5x2.8mm

Rh01-130 | Thermal Cut-off • 130°c • 250v • 2a • Radial • 6x6.5x2.8mm
Rh01-130 | Thermal Cut-off • 130°c • 250v • 2a • Radial • 6x6.5x2.8mm

Rh01-140 | Thermal Cut-off • 140°c • 250v • 2a • Radial • 6x6.5x2.8mm
Rh01-140 | Thermal Cut-off • 140°c • 250v • 2a • Radial • 6x6.5x2.8mm

Rh03b-100 | Thermal Cut-off • 100°c • 250v • 2a • Axial • 10x2.8mm
Rh03b-100 | Thermal Cut-off • 100°c • 250v • 2a • Axial • 10x2.8mm

Rh01-150 | Thermal Cut-off • 150°c • 250v • 2a • Radial • 6x6.5x2.8mm
Rh01-150 | Thermal Cut-off • 150°c • 250v • 2a • Radial • 6x6.5x2.8mm
Step-by-step installation
Follow these steps to install a replacement thermal fuse. This procedure is suitable for hobbyists and technicians; if you are not confident working with mains-voltage appliances, seek qualified assistance.
1. Remove power and access the component
- Unplug the appliance and, where possible, isolate at the MCB for extra safety.
- Remove the cabinet screws and any insulating shields to reach the thermal fuse.
2. Note orientation and wiring
Mark or photograph the original wiring so you replace leads correctly. Most thermal fuses are non-polarised; however, correct mechanical orientation and thermal coupling to the heat source are essential.
Typical wiring (simplified ASCII):

   [Mains Live] ---[Thermal Fuse]---[Heating Element]
   [Mains Neutral] -----------------[Heating Element]

Replace the thermal fuse inline in the live conductor where it was originally installed.
3. Fit the replacement securely
- Use the same mounting style (clamp, bracket, or tab) to ensure the fuse senses the correct temperature.
- If the part requires insulating sleeves or ceramic beads for lead protection, fit them as shown by the original design.
- Use proper crimps or solder joints covered with heat-shrink; avoid loose or twisted bare connections.
4. Verify electrical ratings and simple calculations
Check that the replacement's voltage and current ratings meet appliance demands. Use P = V × I to estimate heater power. Example: for a 230 V element drawing 2 A, P = 230 × 2 = 460 W. Ensure the chosen thermal fuse is rated for the circuit voltage and expected current, and that any series safety cutouts or thermostats are preserved.
5. Test after installation
- With covers still off, reconnect power and monitor for correct operation and absence of overheating.
- Use a thermal probe or IR thermometer to confirm temperatures around the fuse remain below its cutout in normal operation.
Troubleshooting common issues
If the new thermal fuse opens immediately or repeatedly, inspect for these causes:
- Blocked airflow or lint buildup (common in dryers) raising operating temperature.
- Faulty heating element drawing excess current-measure current with a clamp meter.
- Incorrect fuse rating or poor thermal coupling causing premature trip.
For parts and compatible accessories, explore Communica's shop-by-brand listings to compare options and datasheets: Shop by Brand. For broader component browsing, the collections index is useful: Collections.
Practical South Africa notes: availability, lead times and education use
Communica has branches in Samrand (head office), Pretoria CBD, and Cape Town; many common thermal fuses are held in stock for immediate collection. For specialised or high-temperature variants expect lead times-check stock or request quotes using standard account invoicing if purchasing for labs or institutions. For tertiary projects, keep spare fuses on hand (ZAR pricing varies by part and supplier; consult product pages for current figures).
Sources
- Thermal fuse - Wikipedia
- Communica - About Us
- Communica - Branches & Trading Hours
- Communica - All Products
If in doubt about mains-level work or if repeated trips persist, consult a qualified appliance technician. This guide is intended to provide practical, experience-based installation steps and South Africa-relevant purchasing notes; it is not a substitute for certified appliance servicing where required.
Communica supplies semiconductors and electronic components to industries such as automotive, electrical, automation, mining, and education.
Disclaimer: This content is for educational purposes only. Product availability, pricing, and specifications are subject to change. Always verify current details on the retailer's website before making a purchase. We may earn affiliate commissions from qualifying purchases.


Frequently Asked Questions
Get answers to common questions about Circuit Protection And Passive Components
Why Choose Communica?
*Free Shipping
Free shipping for orders over ZAR 1,000.00.
7-Day Returns
Get a full refund if you had the product for less than 7 days.
Quick Delivery
Nationwide delivery within 2 - 4 working days.
