
How to install CABRG58CU coax cable: step-by-step guide for South African makers
Step-by-step guide to installing CABRG58CU coax cable for South African makers and technicians. Tools, connector choices, stripping, crimping, testing and local purchasing notes.
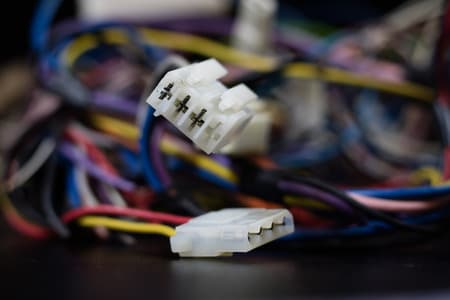
Cable basics
CABRG58CU is a 50-ohm RG58-style coax ideal for short RF and test leads.
Termination steps
Strip carefully, fold braid, then crimp or solder connectors with proper tools.
Test & troubleshoot
Use a multimeter for continuity and an SWR or VNA for RF performance checks.
Overview: What is CABRG58CU coax cable and where it's used
CABRG58CU is a 50-ohm RG58-style coaxial cable commonly used for RF prototyping, antenna leads, test setups and short-run patch leads. This guide explains how to install CABRG58CU coax cable safely and reliably for makers, students and technicians in South Africa, covering cable selection, tools, connectors, preparation and basic testing. Use the term CABRG58CU coax cable throughout when searching local stock or matching parts.
Key characteristics
- Nominal impedance: 50 ohm (suitable for many RF applications).
- Construction: centre conductor (often tinned copper), dielectric, braided shield and jacket.
- Typical uses: bench RF work, short antenna leads, VHF/UHF patch leads.
Tools and materials you'll need
- CABRG58CU coax cable (length per project).
- Appropriate connectors (BNC, TNC, SMA, N-type) and matching crimp or solder types.
- Coax stripper or sharp knife, wire cutters, soldering iron (if soldering), crimp tool, heatshrink and multimeter or SWR meter.
- Optional: cable comb, flux, cable ties, grounding strap.
Connector choice and compatibility
Select connectors that are compatible with 50-ohm RG58-style cable. BNC connectors are common for lab and test gear; SMA and N-type are used where higher frequency performance or weatherproofing are required. Confirm connector inner pin type (solder-pin vs crimp-pin) before purchase.
| Connector | Typical use | Attachment method |
|---|---|---|
| BNC | Lab instruments, short patch leads | Solder or crimp |
| SMA | Compact RF modules, antennas | Crimp or screw |
| N-type | Higher-power outdoor antennas | Threaded, crimp or solder |
Preparation and safety
Work in a clean, well-lit area. For student or classroom installs, supervise heat-based steps and ensure correct ESD/grounding precautions for sensitive RF equipment. If installing external antenna feeds, plan routing to minimise bends (maintain manufacturer minimum bend radius) and keep cable runs as short as practical to reduce loss.
Measuring loss and run length
Remember that RG58-style cable has frequency-dependent attenuation. For quick estimates use the datasheet for CABRG58CU coax cable; typical attenuation at 100 MHz might be modest, rising at VHF/UHF. For critical links, measure with a VNA or use shorter runs. Check local availability and alternatives in the Communica all-products index to compare cable types: All products.
Basic electrical check (Ohm's law reminder)
For DC continuity and shorts, use a multimeter. Ohm's law (V = I × R) helps when diagnosing unexpected voltage drops on supply lines feeding active antennas or inline amplifiers. While RF performance requires specialised equipment, the multimeter confirms centre conductor continuity and shield continuity before applying RF power.
For supplier background and branch collection options, see Communica's About Communica and Branches & Trading Hours.
Related Connectors, Wire & Cable Products
Discover quality connectors, wire & cable products related to How to install CABRG58CU coax cable: step-by-step guide for South African makers

Coax Cable 75r Satellite Cable White Dstv Approved
Coax Cable 75r Satellite Cable White Dstv Approved
Step-by-step: terminating CABRG58CU coax cable
1. Strip the cable
Use a coax stripper set to the correct depths for your connector. Typical strip sequence: outer jacket ~8-12 mm, braid folded back, dielectric exposed to the required length, leaving centre conductor protruding per connector spec. If using a knife, score carefully to avoid nicking the centre conductor.
2. Prepare the braid and shield
Fold the braided shield back over the jacket evenly. For some crimp-style connectors you'll insert a ferrule over the braid first. Ensure no stray braid strands touch the centre conductor.
3. Attach connector (crimp method)
- Slide ferrule over cable.
- Insert cable into connector body so centre pin engages the conductor and dielectric sits to spec.
- Crimp the ferrule with the correct die size; avoid under- or over-crimping.
- Trim any excess centre conductor if required.
4. Attach connector (solder method)
If the connector uses a solder-pin, tin the centre conductor lightly, insert and apply solder briefly. Avoid overheating the dielectric. After soldering, slide the connector body into place and secure any mechanical joints per the connector instructions.
5. Mechanical and environmental finishing
Use heatshrink to reinforce the joint and provide strain relief. For outdoor or rooftop installations consider additional weatherproofing (self-amalgamating tape and UV-resistant heatshrink), and ensure the cable has a proper lightning/grounding path per local safety practice.
Testing and troubleshooting
Continuity and short tests
With a multimeter check: centre conductor continuity end-to-end, shield continuity, and confirm no short between centre and shield. If you detect a short, inspect the connector for stray braid or a nicked dielectric.
Basic RF checks
For antenna and transmitter links, measure VSWR or use a return-loss meter. For student projects where VNAs are not available, keep runs short and test functionality at low power first. If signal loss is higher than expected, check connector seating, crimp integrity and bend radius compliance.
Common problems and fixes
- Intermittent connection: re-crimp or re-solder, check ferrule seating.
- High loss at VHF/UHF: shorten cable run or upgrade to lower-loss cable if required.
- Stray braid causing short: re-strip and ensure braid is folded back cleanly.
Practical South Africa notes: availability, brands and purchasing
Communica stocks a range of coaxial cables, connectors and tools suitable for CABRG58CU coax cable installs. Local factors to consider: stock levels can vary by branch, lead times for specialty connectors may apply, and branch pickup from Samrand or Pretoria CBD can speed project timelines. Check connector and tool options on the Communica shop-by-brand page to find familiar maker and pro brands: Shop by Brand.
Example cost and planning (estimate)
A typical small project might use 5-10 metres of CABRG58CU coax cable, a few BNC connectors and basic tools. Expect small-item purchases for connectors and heatshrink; larger items like crimp tools are reusable investments. Prices vary-treat local ZAR figures as estimates and check current stock for quotes and VAT invoices.
Further learning and parts browsing
For additional cables, tools and enclosures relevant to RF and maker projects, explore Communica's full collections: Collections. If you need procurement assistance for education or departmental purchases, Communica supports account quotes and VAT invoicing-check branch options and trading hours for collection: Branches & Trading Hours.
Sources
Communica supplies semiconductors and electronic components to industries such as automotive, electrical, automation, mining, and education.
Disclaimer: This content is for educational purposes only. Product availability, pricing, and specifications are subject to change. Always verify current details on the retailer's website before making a purchase. We may earn affiliate commissions from qualifying purchases.

Frequently Asked Questions
Get answers to common questions about Connectors Wire And Cable
Why Choose Communica?
*Free Shipping
Free shipping for orders over ZAR 1,000.00.
7-Day Returns
Get a full refund if you had the product for less than 7 days.
Quick Delivery
Nationwide delivery within 2 - 4 working days.
