
How to Install a Thermal Fuse in a Microwave: Step-by-Step Guide for SA Makers and Technicians
Learn how to safely identify and install a thermal fuse in a microwave. Practical South African sourcing, tooling, troubleshooting and branch pickup notes.
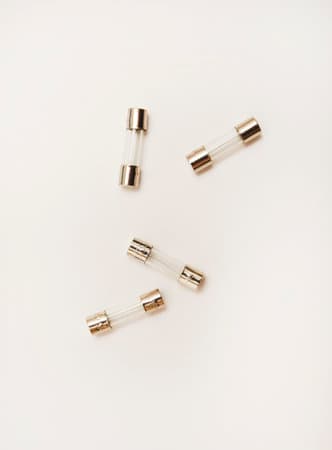
Safety First
Always isolate power, discharge capacitors and use insulated tools before work.
Match Specs
Replace with the exact temperature and terminal type to maintain protection.
Local Sourcing
Check Communica branches for stock, VAT invoices and branch pickup options.
Overview: What a thermal fuse does and why replacement matters
A thermal fuse is a single-use temperature safety device that opens a circuit when a set temperature is exceeded. In microwaves it often protects against overheating of the magnetron or internal components. This guide explains how to identify the correct thermal fuse, prepare tools and parts, and safely replace the component while noting South African supply and workshop considerations. Where relevant, check local stock and product ranges at Communica collections for compatible components and tools.
Safety first: essential precautions
Before any work on a microwave: unplug the appliance, discharge capacitors if you are competent to do so, and use insulated tools. Thermal fuses are often located near the magnetron or high-voltage components; if you are unsure or uncomfortable, consult a qualified technician. Note that replacing a thermal fuse restores the safety device but does not address why it overheated-inspect ventilation, door seals, and the magnetron circuit.
Tools and parts you'll typically need
- Replacement thermal fuse with correct temperature rating and lead style
- Insulated screwdrivers and pliers, wire cutters/strippers
- Soldering iron or suitable crimp connectors (depending on original termination)
- Multimeter for continuity checks and voltage verification
- Heatshrink or high-temperature sleeving and electrical tape
- Personal protective equipment: safety glasses and gloves
Identifying the correct thermal fuse
Match the replacement to the original by checking: temperature rating (eg. 72°C, 150°C), current rating, form factor (axial leads, tab terminals), and whether it is normally closed. If the original is missing readable markings, measure physical dimensions and terminal type. What type of thermal fuse is suitable for microwaves. Communica stocks a wide range of thermal cutouts and related components-search brands and categories on the Shop by Brand page to compare parts and datasheets.
Quick spec comparison table
| Parameter | Common values | Notes |
|---|---|---|
| Temperature rating | 72°C, 110°C, 150°C | Choose exact rating used by manufacturer |
| Current rating | 1-10 A (typical) | Ensure rating meets circuit requirements |
| Termination | Axial leads / Faston tabs | Match mounting and connection method |
Consideration: In South Africa, lead times for specific thermal fuses can vary. If a precise temperature rating is hard to find locally, choose a stocked alternative only if it exactly matches the original. Check stock availability and branch pickup options at Branches & Trading Hours.
Pre-replacement checks and continuity testing
Use a multimeter to confirm the thermal fuse is open (no continuity) if it has blown. With power removed, test across the fuse terminals: a good fuse shows near-zero ohms. Example: If multimeter reads OL (open), the fuse has operated. Also inspect wiring insulation for heat damage; replace or re-sleeve as needed. For general parts browsing use the where to order electronic components online in South Africa index to view compatible holders and connectors.
Related Circuit Protection & Passive Components Products
Discover quality circuit protection & passive components products related to How to Install a Thermal Fuse in a Microwave: Step-by-Step Guide for SA Makers and Technicians

8a Cer 6x32 S/b | Ceramic Fuse • Slow Blow • 8a • 6ø X 32mm
8a Cer 6x32 S/b | Ceramic Fuse • Slow Blow • 8a • 6ø X 32mm

8a Cer 6x32 F/b | Ceramic Fuse • Fast Blow • 8a • 6ø X 32mm
8a Cer 6x32 F/b | Ceramic Fuse • Fast Blow • 8a • 6ø X 32mm

8a Cer 5x20 S/b | Ceramic Fuse • Slow Blow • 8a • 5ø X 20mm
8a Cer 5x20 S/b | Ceramic Fuse • Slow Blow • 8a • 5ø X 20mm

8a Cer 5x20 F/b | Ceramic Fuse • Fast Blow • 8a • 5ø X 20mm
8a Cer 5x20 F/b | Ceramic Fuse • Fast Blow • 8a • 5ø X 20mm

8a 6x32 S/b | Glass Fuse • Slow Blow • 8a • 6.3Ø X 32mm
8a 6x32 S/b | Glass Fuse • Slow Blow • 8a • 6.3Ø X 32mm

8a 6x32 F/b | Glass Fuse • Fast Acting • 8a • 6.3Ø X 32mm
8a 6x32 F/b | Glass Fuse • Fast Acting • 8a • 6.3Ø X 32mm

8a 5x20 S/b | Glass Fuse • Slow Blow • 8a • 5Ø X 20mm
8a 5x20 S/b | Glass Fuse • Slow Blow • 8a • 5Ø X 20mm

8a 5x20 F/b | Glass Fuse • Fast Acting • 8a • 5Ø X 20mm
8a 5x20 F/b | Glass Fuse • Fast Acting • 8a • 5Ø X 20mm

80ma 6x32 S/b | Glass Fuse • Slow Blow • 80ma • 6.3Ø X 32mm
80ma 6x32 S/b | Glass Fuse • Slow Blow • 80ma • 6.3Ø X 32mm

80ma 6x32 F/b | Glass Fuse • Fast Acting • 80ma • 6.3Ø X 32mm
80ma 6x32 F/b | Glass Fuse • Fast Acting • 80ma • 6.3Ø X 32mm

80ma 5x20 S/b | Glass Fuse • Slow Blow • 80ma • 5Ø X 20mm
80ma 5x20 S/b | Glass Fuse • Slow Blow • 80ma • 5Ø X 20mm

80ma 5x20 F/b | Glass Fuse • Fast Acting • 80ma • 5Ø X 20mm
80ma 5x20 F/b | Glass Fuse • Fast Acting • 80ma • 5Ø X 20mm
Step-by-step replacement procedure
1) Isolate power: Unplug the microwave and wait several minutes for capacitors to discharge. Confirm absence of mains with a non-contact tester or multimeter. 2) Access the internal chassis: Remove external cover screws and lift the cabinet carefully. Note the location of the thermal fuse-commonly near the magnetron or fan housing. 3) Photograph the wiring arrangement for reassembly reference. 4) Disconnect leads: Cut or de-solder wires close to the original terminations, keeping enough length to attach the new fuse. 5) Install replacement: Connect leads using crimped Faston terminals or solder joints, and insulate with heat-resistant sleeving and heatshrink. 6) Secure the fuse in original mounting position to ensure accurate temperature sensing. 7) Reassemble and test: Refit cabinet, perform a power-on test with a non-metallic load (e.g., a cup of water) while observing safe distancing-if unsure, have a trained technician verify the work.
Example wiring diagram (ASCII)
Power -> Primary circuit -> [Thermal Fuse] -> Magnetron / Heater
                                    |
                                 Fan motor
Troubleshooting common issues
- Microwave still does not heat: check magnetron, high-voltage diode, and capacitor; thermal fuse replacement alone may not fix the root cause.
- Fuse blows repeatedly: inspect for airflow obstruction, failed fan motor, or shorted components causing overheating.
- Poor connections or arcing: ensure terminals are tight and properly insulated; replace damaged wiring.
Practical South African considerations and sourcing
For makers, students and technicians in South Africa, Communica provides local access to thermal protection components, soldering tools and high-temperature sleeving. Lead times can vary-stocked items are available for branch pickup at Samrand, Pretoria CBD and Cape Town; check each branch's availability and trading hours via the Branches & Trading Hours page. For education and lab procurement, Communica can provide VAT invoices and bulk sourcing through account quotes-see the company overview on the About Us page for context on services and distribution footprint.
Example cost and parts checklist (illustrative, ZAR estimates)
| Item | Typical range (ZAR) | Notes |
|---|---|---|
| Thermal fuse (single) | R30-R200 | Depends on rating and brand; estimates only |
| High-temp sleeving, heatshrink | R20-R80 | Small quantities for single repair |
Final checks and good practice
After replacement, verify continuity across the new fuse and confirm secure mechanical mounting. Document the repair for asset records-important for lab or institutional equipment. If a repeated failure occurs or you encounter high-voltage systems beyond your competence, seek a qualified appliance technician.
Sources
Communica supplies semiconductors and electronic components to industries such as automotive, electrical, automation, mining, and education.
Disclaimer: This content is for educational purposes only. Product availability, pricing, and specifications are subject to change. Always verify current details on the retailer's website before making a purchase. We may earn affiliate commissions from qualifying purchases.


Frequently Asked Questions
Get answers to common questions about Circuit Protection And Passive Components
Why Choose Communica?
*Free Shipping
Free shipping for orders over ZAR 1,000.00.
7-Day Returns
Get a full refund if you had the product for less than 7 days.
Quick Delivery
Nationwide delivery within 2 - 4 working days.
