
How to Improve Heat Dissipation in 3D Printers: Practical Methods for Makers and Students
Learn practical ways to improve heat dissipation in 3D printers - fans, heatsinks, wiring, calculations and South Africa procurement tips for makers and labs.
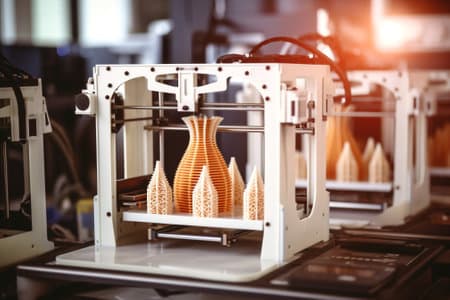
Targeted Cooling Upgrades
Prioritise hotend and controller airflow with right-sized fans and ducts.
Thermal Interfaces Matter
Use heatsinks and rated thermal pads to bridge components to cooling mass.
Measure and Verify
Log temps and test fan PWM to confirm improvements and safe operation.
Overview: Why heat dissipation matters for 3D printing
Effective heat dissipation in 3D printers affects print quality, component longevity and safety. Poor thermal management can cause filament stringing, heat creep, stepper motor overheating and controller board thermal throttling. This guide explains practical ways to improve heat dissipation on common desktop FDM printers used by South African makers, tertiary labs and small workshops.
Common heat sources and failure modes
- Hotend and heatblock: concentrated heat that can travel up the hotend (heat creep).
- Heated bed: large-area heat that affects frame and nearby electronics.
- Stepper motors: heat from current through coils, especially with microstepping.
- Controller boards and drivers: MOSFETs and drivers that need airflow or heatsinks.
Key strategies at a glance
- Improve convection: fans, ducting and chamber airflow.
- Conduct heat away: heatsinks, aluminium mounts and thermal pads.
- Manage heat sources: tune currents, use part cooling and thermal barriers.
- Monitor and test: thermistors/IR checks and safety cutoffs.
Standards, components and selection criteria
When selecting cooling components think about size, airflow (CFM or m3/h), static pressure for ducts, tacho or PWM control, and electrical compatibility with your printer's 12V or 24V supply. Communica stocks common fan sizes, heatsinks, thermal pads and temperature sensors useful for upgrades - browse categories on the site for parts and alternatives: Shop by Category and brand listings at Shop by Brand.
Fan selection table (quick comparison)
| Fan Type | Best for | Notes |
|---|---|---|
| 40 mm radial (blower) | Direct hotend cooling | High static pressure, good for ducts |
| 40-60 mm axial | Electronics and part cooling | Higher airflow, less pressure |
| 80-120 mm case fans | Chamber ventilation | Good for removing heated air from enclosures |
Thermal interface and heatsink choices
Use aluminium heatsinks on stepper drivers and MOSFETs with thermal adhesive or pads rated for silicone or ceramic conductivity. Thin, high-conductivity thermal pads (e.g., 1-2 W/mK) bridge PCB components to heatsinks without messy paste. For hotends, consider a dedicated heatbreak and an all-metal throat to reduce heat transfer into the filament path.
Branch and pickup note: Communica's Samrand warehouse often holds common fans, heatsinks and thermal pads for immediate collection; check branch stock and hours at Branches & Trading Hours.
Electrical compatibility and current limits
Confirm fan voltage (12V vs 24V) and current draw before wiring into your printer's supply. For calculating power use P = V x I. Example: a 12V fan drawing 0.25 A consumes P = 12 x 0.25 = 3 W. Use Ohm's law (V = I x R) when checking resistances in heater circuits or when designing simple series resistors for low-voltage signalling.
Related 3D Printing & Accessories Products
Discover quality 3d printing & accessories products related to How to Improve Heat Dissipation in 3D Printers: Practical Methods for Makers and Students

Reprap Arduino Mega Shield For 3d Or Cnc Drive Control
Reprap Arduino Mega Shield For 3d Or Cnc Drive Control
Practical upgrades and step-by-step examples
Below are actionable upgrades sorted by priority and complexity, from quick fixes to more advanced mods suitable for university labs and makerspaces.
1. Improve part cooling (low effort)
Fit a higher-CFM axial fan or redesign the fan duct to increase static pressure to the nozzle. Many filament issues resolve by giving fresh air more directly to the print. Check product ranges under All Products for compatible fan sizes and ducts.
2. Control heat creep (moderate effort)
Add a dedicated blower on the hotend heatsink to keep the heatbreak cool. Use a radial blower when the duct path is narrow. Example wiring for a 12V radial fan to a MOSFET-controlled fan output (PWM capable):
Hotend Fan Wiring (ASCII)

 +12V ----------+-------------------------+
                |                         |
               Fan+                      Fan-
                |                         |
 GND ----------+---- MOSFET (FAN_GATE) ---+  (to controller ground)

Note: Use common ground and check controller fan output voltage/current limits.
3. Electronics cooling and airflow (moderate effort)
Mount heatsinks on stepper drivers and install a small 40-60 mm axial fan to create continuous airflow across the controller board. For enclosed printers, add an exhaust fan (80-120 mm) and a filtered intake to create cross-flow without dust buildup.
4. Advanced: Active bed and chamber management
If you run a heated chamber, actively vent excess heat to protect electronics. Use thermostatic control or firmware limits to prevent controllers from being exposed to sustained high ambient temperatures that could shorten capacitor life. For procurement teams, consider specifying components with higher rated operating temperatures when purchasing for prolonged chamber use; browse relevant ranges at Collections.
Calculations, testing and troubleshooting
Basic calculations
Power dissipation (P): P = V x I. If a stepper driver dissipates 5 W, and you add a heatsink with a thermal resistance of 10 C/W, expected temperature rise is 5 W x 10 C/W = 50 C above ambient (estimate). These are simplified calculations - measure with a thermometer or IR gun for accuracy.
Testing steps
- Use an IR thermometer or thermistor to log hotend, driver and motor temperatures during a 30-60 minute print.
- Check fan RPM (tacho) where possible and confirm PWM control responds linearly.
- Inspect for thermal throttling symptoms: skipped steps, sudden layer shifts or unexpected shutdowns.
Troubleshooting checklist
- If drivers overheat despite heatsinks, reduce motor current (adjust stepper drivers), increase airflow or revisit mounting thermal interface.
- Persistent heat creep: confirm heatbreak type, check cooling duct alignment and consider a different heatbreak material.
- High ambient in workshops: add enclosure vents or room ventilation; electronic components are sensitive to sustained heat.
Local buying, parts bundles and practical notes for South Africa
In South Africa, consider lead times and VAT invoices for education or procurement purchases. Communica offers branch collection from Samrand (head office) and other branches; check local stock before planning upgrades to minimise downtime. For common upgrades (fans, heatsinks, thermal pads) expect ZAR estimates ranging from ZAR 30-ZAR 400 per component depending on size and brand; actual prices vary and should be checked on product pages.
Simple accessory bundle suggestion
- 40 mm radial blower + 40 mm axial fan + thermal pads + small aluminium heatsink = essential cooling starter kit for most printers.
- Request a quote for bulk/education purchases to get VAT invoices and stock confirmation: see About Us for company purchasing details.
Sources
Communica supplies semiconductors and electronic components to industries such as automotive, electrical, automation, mining, and education.
Disclaimer: This content is for educational purposes only. Product availability, pricing, and specifications are subject to change. Always verify current details on the retailer's website before making a purchase. We may earn affiliate commissions from qualifying purchases.

Frequently Asked Questions
Get answers to common questions about 3d Printing And Accessories
Why Choose Communica?
*Free Shipping
Free shipping for orders over ZAR 1,000.00.
7-Day Returns
Get a full refund if you had the product for less than 7 days.
Quick Delivery
Nationwide delivery within 2 - 4 working days.
